How to revive overwintered pepper plants (step-by-step)
- ourspanishfarm
- May 11
- 4 min read
Every spring, one of my favourite gardening moments is bringing the overwintered pepper plants back to life.
After months of looking tired, leafless, mildly offended, and like they may never contribute anything useful again, they suddenly begin to wake up. Tiny green shoots appear, stems firm up, and before long they are ready for another season.
There is something deeply satisfying about it.
Instead of starting again from seed and waiting endlessly, you begin the year with mature pepper plants that already have established roots, thicker stems, and a head start on production.
If you’ve stored peppers through winter, here is how I revive them and prepare them for their new garden bed season.
Why overwinter pepper plants at all?
Pepper plants are perennial in warm climates, but in colder winters they are often grown as annuals. If you want to read how I prepared them for winter storage, read How to Overwinter Peppers and Jalapeño Plants: A Gardener’s Guide.
That means many gardeners throw them away each autumn and start again the next year.
But if you can protect them through winter indoors, in a greenhouse, or in a frost-free space, they often come back stronger and faster than first-year plants.
It feels a bit like cheating. Very enjoyable cheating.
Step 1: Bring them into light and warmth
After winter storage, pepper plants need the signal that spring has arrived.
Move them into brighter conditions with gentle warmth. A sunny window, greenhouse, sheltered patio, or grow lights all work well depending on your setup.
Don’t shock them immediately with blazing full sun after months indoors.
Think gentle reintroduction, not boot camp.
Step 2: Inspect the plant honestly
Now is the time for truth.
Check stems for firmness, look for green tissue when lightly scratched, inspect for pests, mould, dead branches, or signs of rot.
Some overwintered peppers bounce back beautifully. Others look like they’ve seen things.
If stems are soft, blackened, or fully dead, prune back to healthy wood or accept that nature has made the decision for you.
Step 3: Prune away the dead and messy growth
Most overwintered peppers benefit from a tidy-up.
Remove dry twigs, weak growth, crossing branches, and obviously dead material. This encourages fresh shoots and helps shape the plant for the new season.
You do not need to butcher it dramatically. Just clean, sensible pruning.
If the plant already has strong new shoots, be especially careful not to remove the good bits in a fit of enthusiasm.
Step 4: Refresh the roots if needed
If your peppers stayed in pots all winter, they may appreciate fresh compost or a slightly larger pot before planting out.
Check whether roots are circling heavily or the compost has become tired and compacted.
Sometimes a fresh potting mix and a light root loosen is enough to make them think life is worth living again.
Step 5: Start feeding lightly
Once new growth begins, start feeding gently.
A balanced liquid feed or mild fertiliser helps support fresh leaves and root activity. Don’t overdo it early. The plant is waking up, not preparing for the Olympics.
Once active growth is obvious, feeding can increase normally.
Step 6: Remove early flowers (for now)
This part can feel cruel.
Overwintered peppers often try to flower early because they are mature plants. But if conditions are still cool or the plant hasn’t rebuilt enough leafy growth yet, early flowers can drain energy. I usually pinch off the first flush and let the plant focus on leaves, stems, and strength. It hates this. Later it forgives me.
Step 7: Harden them off before planting out

This is where impatience ruins things.
Even if the plant looks ready, it needs gradual exposure to outdoor conditions. Wind, direct sun, cool nights, and fluctuating temperatures are very different from indoor life.
Start with a few hours outside in sheltered shade, then increase sun and time outdoors over a week or two. (I had them out a few hours every day for abount a week.
Treat it like reintroducing a retired athlete to competition.
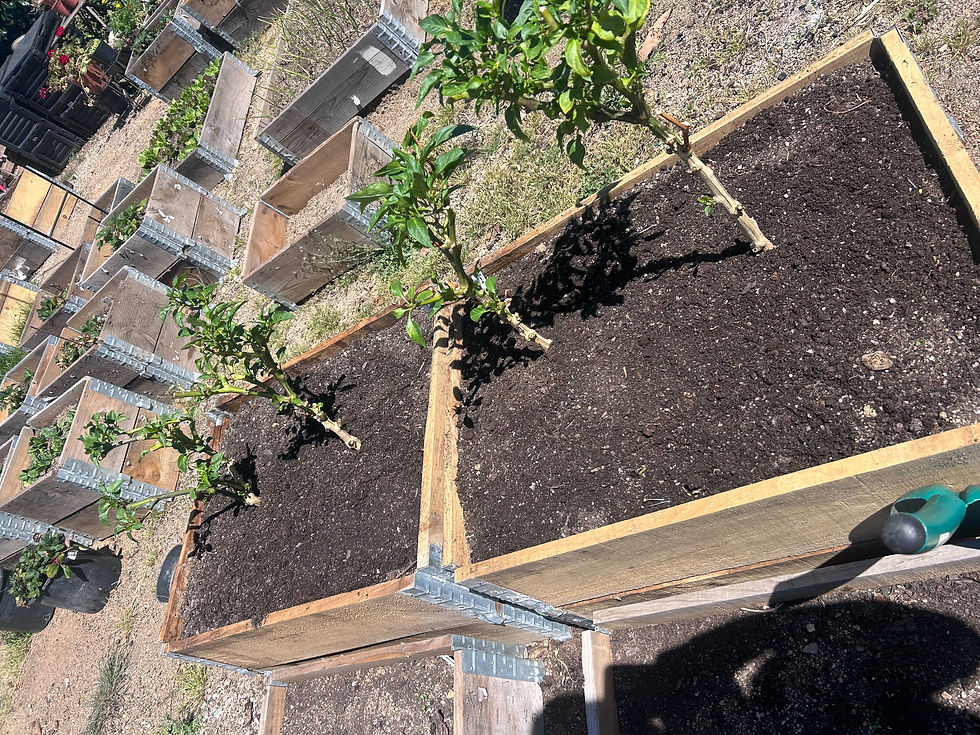
Step 8: Prepare the garden bed properly
Before planting day, make the bed worth moving into.
Loosen the soil, add compost or well-rotted organic matter, ensure drainage is decent, and water beforehand if dry. Peppers like warmth, fertility, and a soil that doesn’t behave like wet concrete. If your climate gets intense summer sun, think ahead about mulch or light shade options too.
Step 9: Plant carefully and don’t rush the season
Wait until nights are reliably mild. I checked the forecast this morning, and according to the app, no night under +10C anymore.
Cold soil and chilly nights can stall peppers badly, even if they survive. Once conditions are right, plant them into the bed at the same depth as the pot, water well, and let them settle.
Then stand back and admire your unfair seasonal advantage. ;)
What to expect next
Overwintered peppers often pause briefly after transplanting, then surge.
Because the root system already exists, they can move into flowering and fruiting faster than first-year plants. Some become impressively productive.
Others remain dramatic. That is part of the pepper experience.
Not every pepper is worth overwintering.
Keep your best performers, favourite varieties, or plants that have proven productive. Weak, disease-prone, miserable specimens do not deserve valuable winter housing.
Space is precious. Choose winners.
Reviving overwintered pepper plants is one of the smartest ways to get a jump on the growing season. You save time, keep varieties you love, and often harvest earlier than if starting from seed.
More importantly, there is something satisfying about carrying life through winter and watching it thrive again in spring. Every year, when I move those old peppers back into the garden beds, it feels less like planting and more like a reunion.


Comments