


Canning Korean beef: A flavorful preservation method
Updated: Sep 27

Korean beef is one of those jars that disappears from my pantry faster than I can make it ;) Tender chunks of beef in a sweet, garlicky soy and ginger sauce, ready to heat up for quick lunches, rice bowls and wraps. Here’s exactly how I make it and get it safely into jars.
Note: This is my own recipe, not a lab-tested one. There’s no USDA-tested Korean beef, so I follow the USDA method and times for raw-packed cubed beef (75 minutes for pints, 90 for quarts). The USDA raw pack doesn’t add any liquid, so the few spoonfuls of marinade in each jar are my own twist.
Why I can Korean beef
Convenience: A jar on the shelf means dinner’s ready in minutes. Just heat it up and serve it over rice.
Flavor: The beef soaks up the marinade in the jar and comes out fork-tender.
Cost-effective: I buy beef in bulk when it’s on sale and can it, so nothing goes to waste.
What you’ll need
Ingredients
Makes about 4 pint jars
4 pounds (1.8 kg) beef chuck or brisket, trimmed of excess fat and cut into bite-sized chunks
3/4 cup beef stock
1/2 cup soy sauce
1/3 cup brown sugar
5–6 cloves garlic, minced
1 tablespoon sesame oil
2 tablespoons rice vinegar
1 tablespoon ginger, minced
2 tablespoons Sriracha (or any hot sauce)
1 teaspoon onion powder
1½ teaspoons black pepper
1 tablespoon salt
Equipment
Pint mason jars with new two-piece lids
A canning funnel and a spoon for packing
A jar lifter
A clean cloth or paper towel
Step-by-step canning process
1. Marinate the beef
Trim the excess fat off the beef and cut it into bite-sized chunks. Put the beef chunks in a large bowl, add all the sauce and spices, and stir everything around to make sure all the meat is coated. Cover the bowl and pop it in the fridge to marinate for at least 30 minutes.
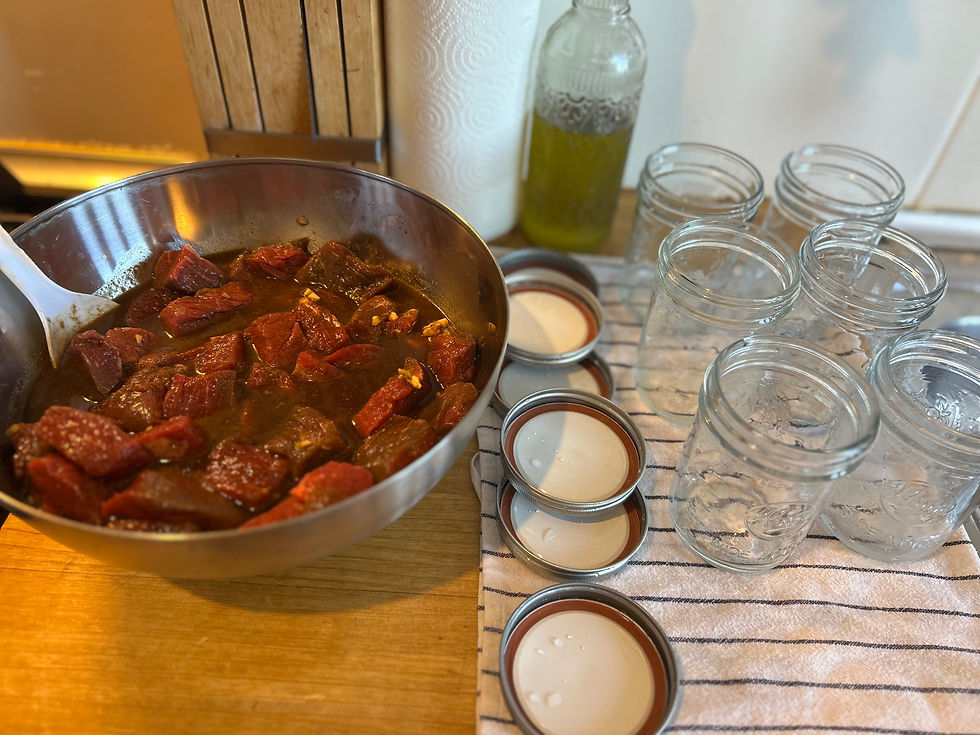
2. Jars and canner
While the beef marinates, wash your pint jars and keep them warm, and get your new lids and bands ready. Put the rack and the amount of water your manufacturer recommends in your pressure canner and start warming it up.
3. Fill the jars
Use a canning funnel to pack the raw beef loosely into the warm jars, then spoon the remaining marinade over the top, leaving a 1-inch headspace. This is a raw pack, so the beef goes in raw and makes its own juices in the canner. Remove any air bubbles, then wipe the rims with a clean cloth dampened with a little vinegar, since the sesame oil in the marinade can keep the lids from sealing.
4. Process in a pressure canner
Place the lids on the jars and screw the bands on fingertip-tight. Put the jars in the canner, lock the lid and let the canner vent a steady stream of steam for 10 minutes before you put the weight on. Process pint jars for 75 minutes and quart jars for 90 minutes at the right pressure for your altitude and canner type (see my altitude chart). I’m at 2,273 feet, so I use 15 lb on my weighted gauge.
5. Cool and store
Turn off the heat and let the canner cool down naturally until the pressure reads zero. Then remove the weight, wait 10 minutes, and open the lid away from your face (that steam is no joke!). Lift the jars out with a jar lifter onto a towel on the counter and let them cool undisturbed for 12–24 hours, then check the seals (the lids shouldn’t flex up and down when you press the center). Take the bands off, then store them in a cool, dark place.
I just open a jar, heat it through and serve it over rice, in a quick stir-fry, or even in tacos for a fusion twist. If you like it sticky, stir in a little cornstarch mixed with water while it heats up ;)
It’s become one of my most-made recipes (it even made my what I’m preserving in May list ;)).
More meals in a jar: try my boeuf bourguignon, my canned goulash, my step-by-step chicken canning guide, or my Texas chili when I want it spicy ;)


For Korean beef, your instructions say pack cooked beef into jars? Was that a mistake? Not cooked correct?